Art Technologies 1201
Art Projects
Fall Term Projects (September - January)
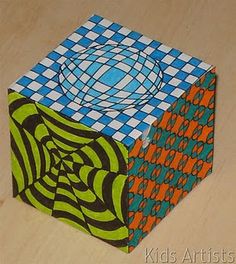
Doodle Drawing (Introductory Project)
For this project, we will look at doodle drawings and designs. A doodle is an unfocused or unconscious drawing made while a person's attention is otherwise occupied. Doodles are simple drawings that can have concrete representational meaning or may just be abstract shapes. Stereotypical examples of doodling are found in school notebooks, often in the margins, drawn by students daydreaming or losing interest during class. Other common examples of doodling are produced during long telephone conversations if a pen and paper are available.
Because you will be learning how to express yourself through art, you will focus your doodle around yourself. You will choose an image to represent you to draw in the center of your page (this will be your focal point) and then fill the rest of your page with random doodles, shapes, lines, words, and patterns. Your drawing will be completed in pencil, outlined with marker, and then coloured completely. Please try your best to keep your project neat.
This project will help me to get to know you as an artist and express your personality. Remember to be creative!
Examples of doodle meanings can be found here and here.
Examples of art doodles can be found here and here are examples of doodles found in Google.
For detailed instructions, please see the PowerPoint presentation below.
|
| ||||
| doodle_drawing_rubric.pdf |
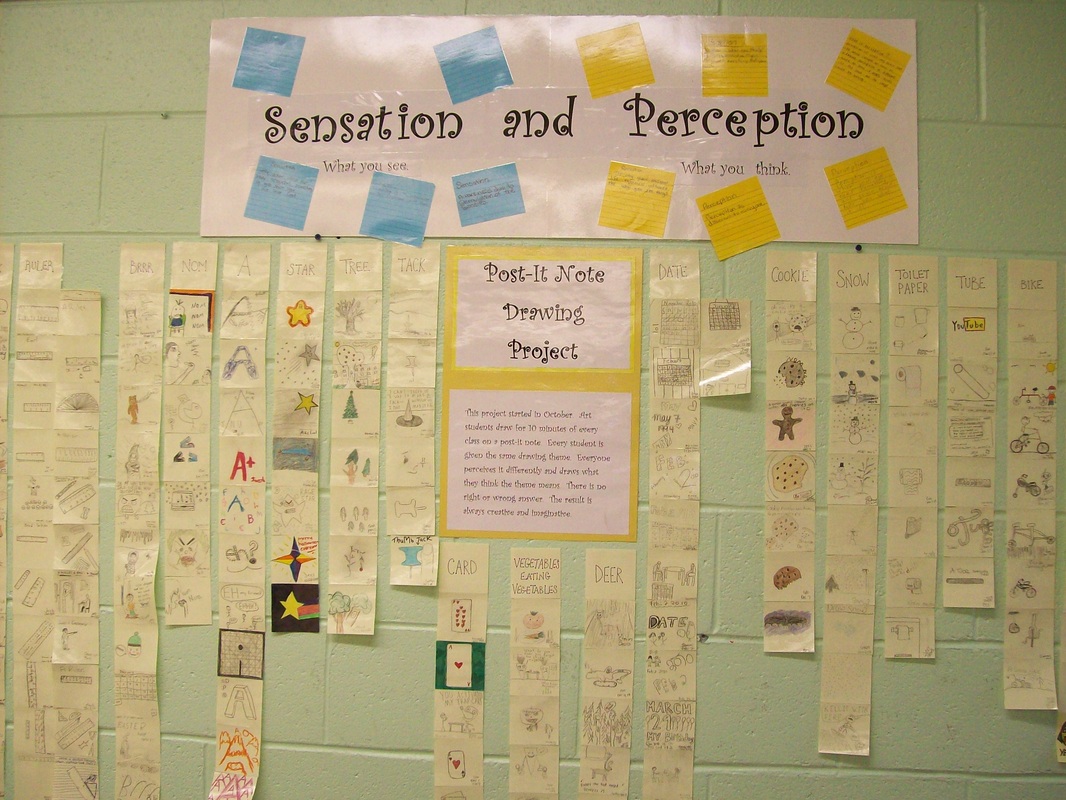
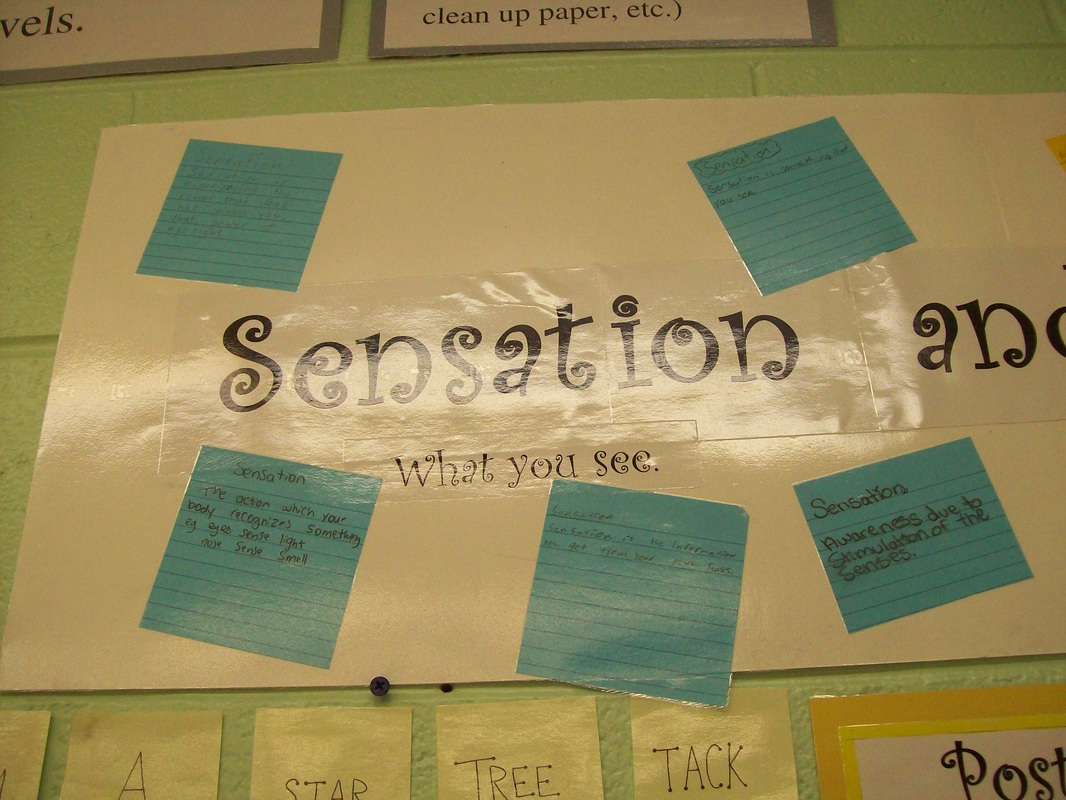
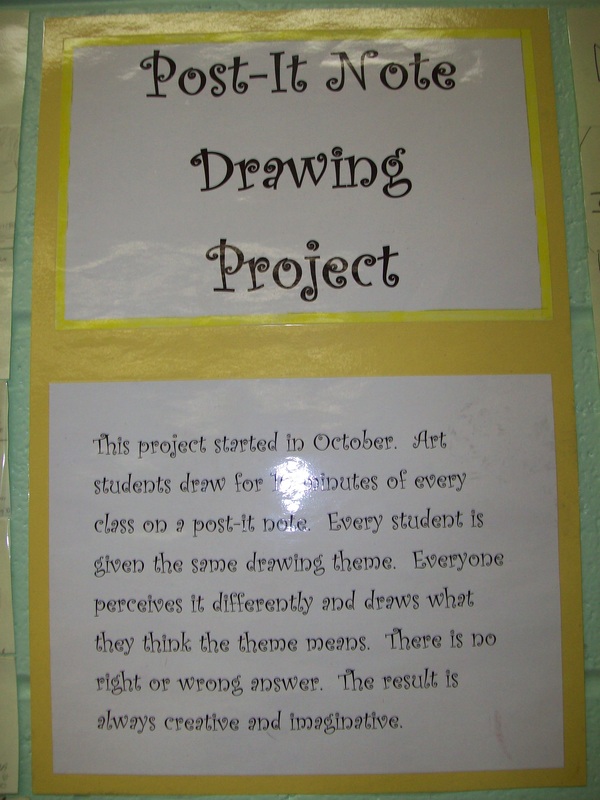
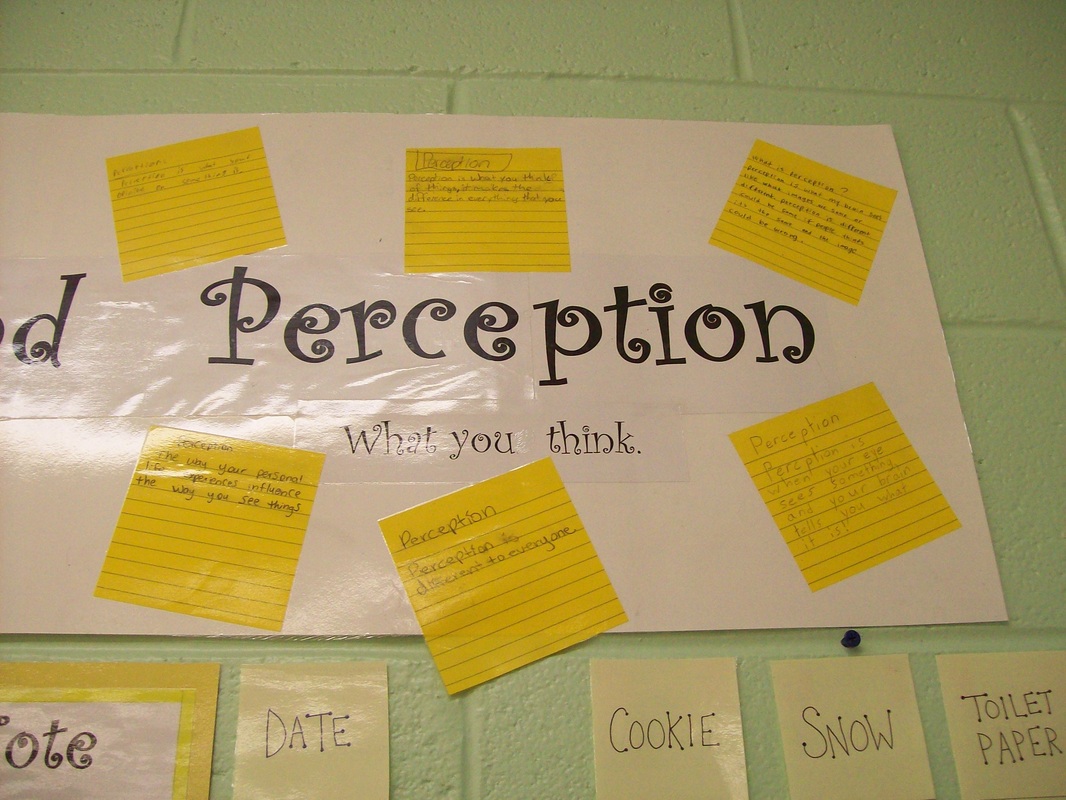
Sensation and Perception
Due September 16, 2016
We will look at the difference between sensation and perception and how both can affect how we create and view art.
Sensation is the beginning of our ability to understand our environment. Before we can perceive, we must sense something. Our senses help us to gather information about our environment. Sensation and perception are linked. Once you are aware or a sensation, your brain is involved and it becomes a perception. Perception means that you have become aware of a stimulus directly through your senses. It also means to become aware of something and to achieve understanding.
We will discuss how different cultures have different perceptions of beauty. We will also discuss how each individual person has their own perception of beauty based on their thoughts, beliefs, education, and environment.
You will create a page in your art book called "What is Beauty?" You will draw images that explain your perception of beauty and write a few sentences to describe your page. Remember to be creative!
For detailed information on this project please see the PowerPoint presentation below that will be discussed in class.
|
|
| ||||
| what_is_beauty_rubric.pdf |
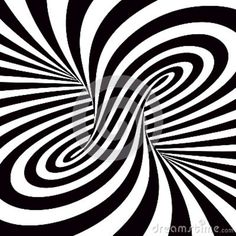
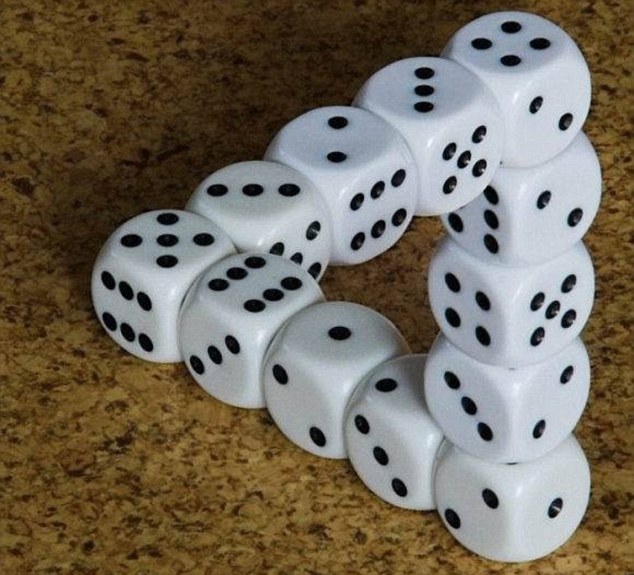
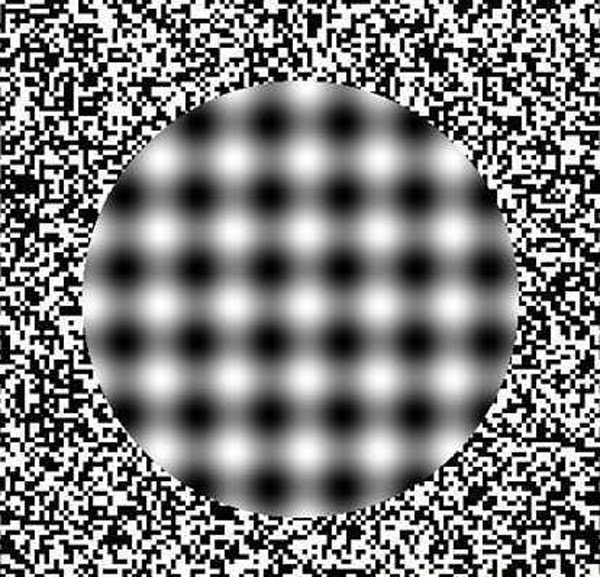
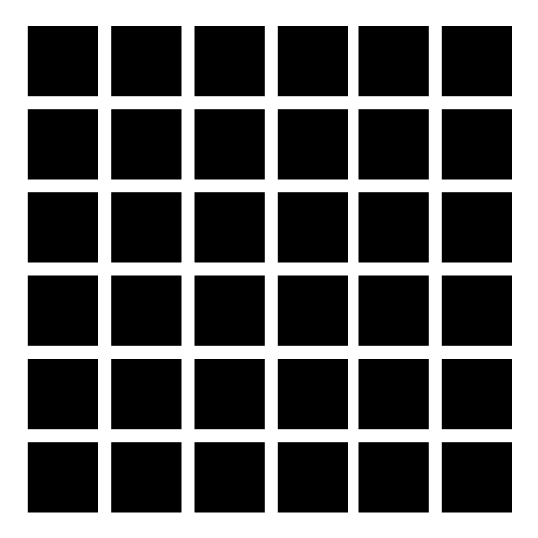
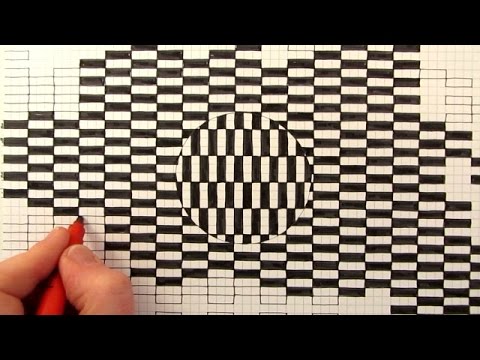
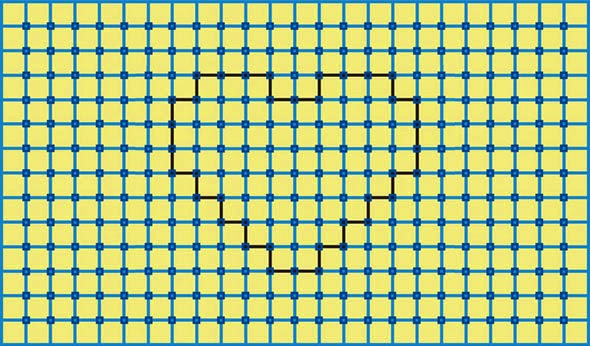
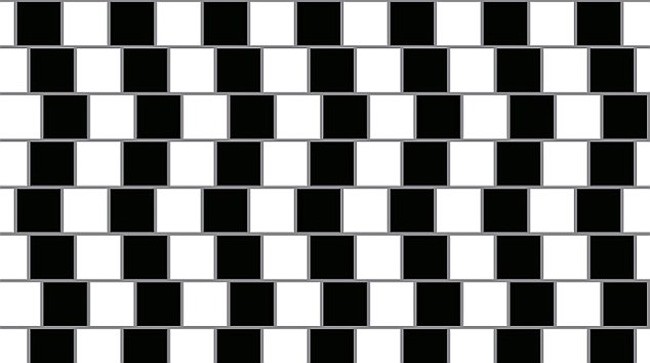
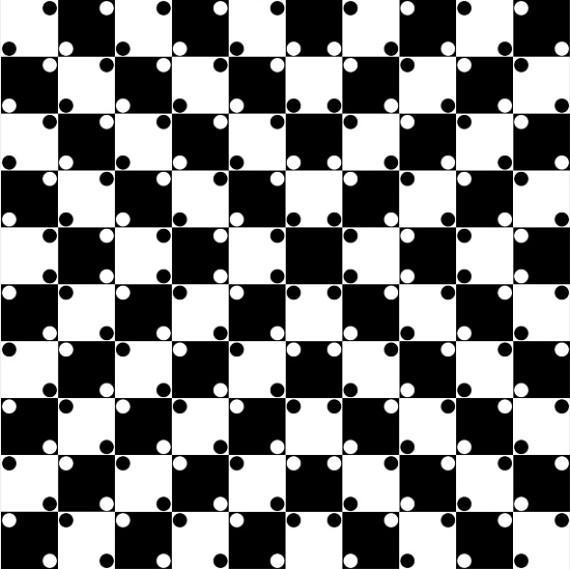
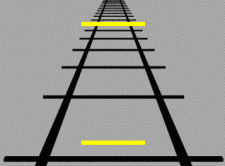
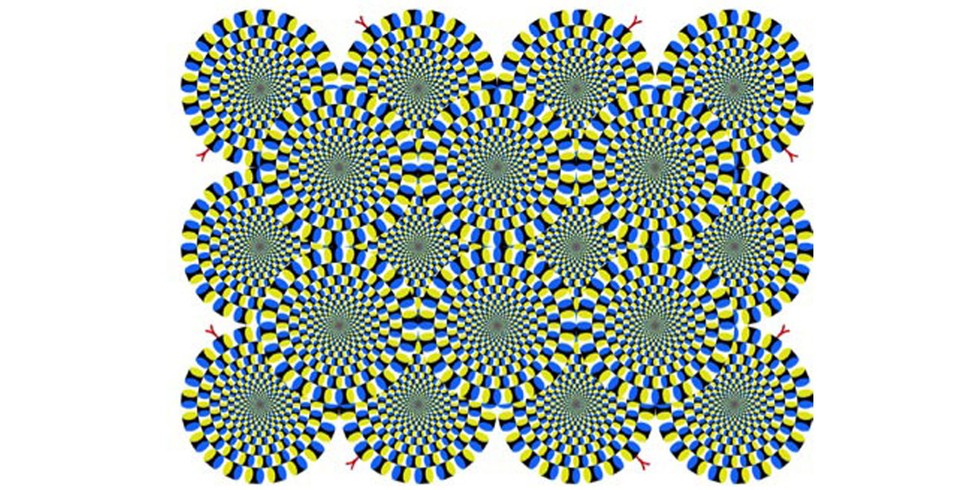
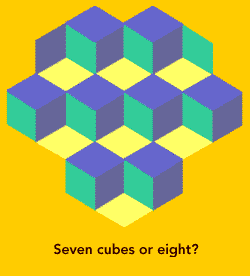
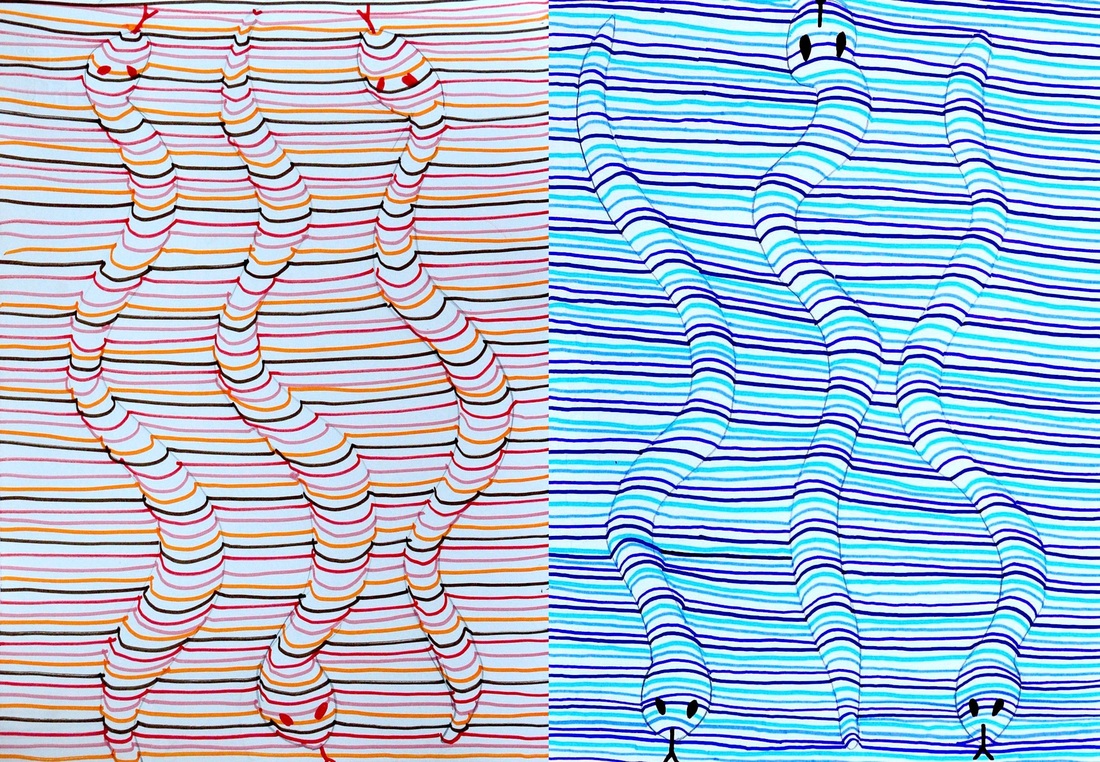
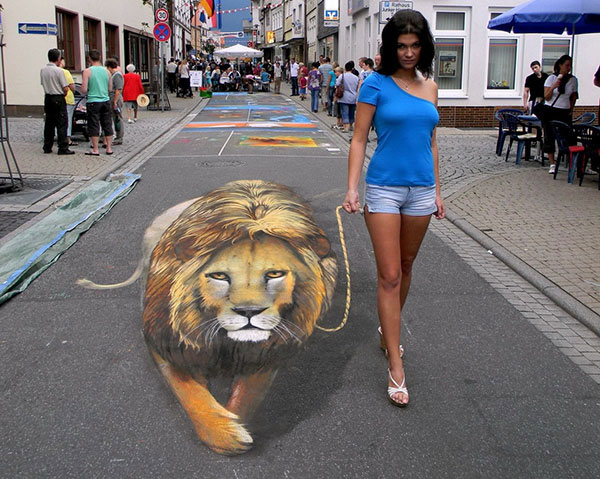
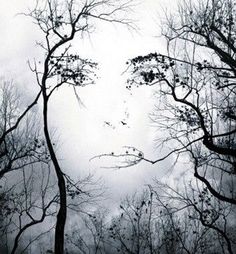
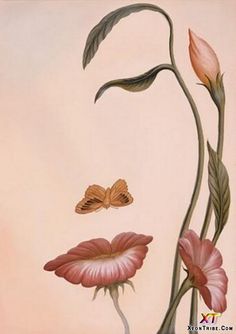
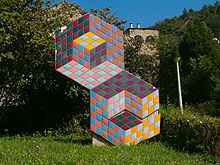
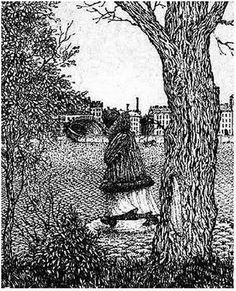
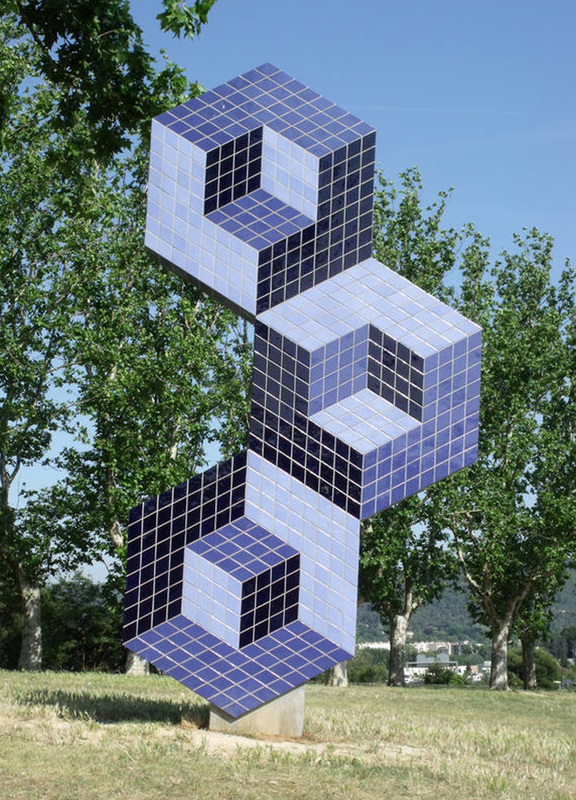
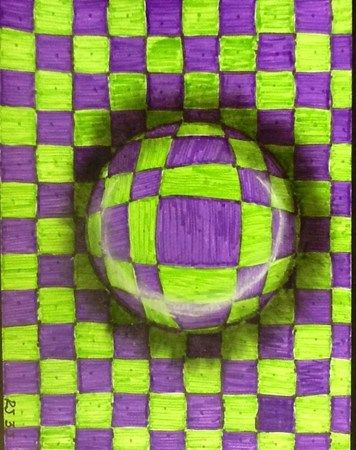
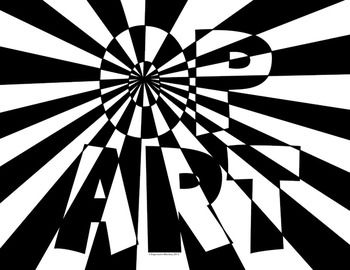
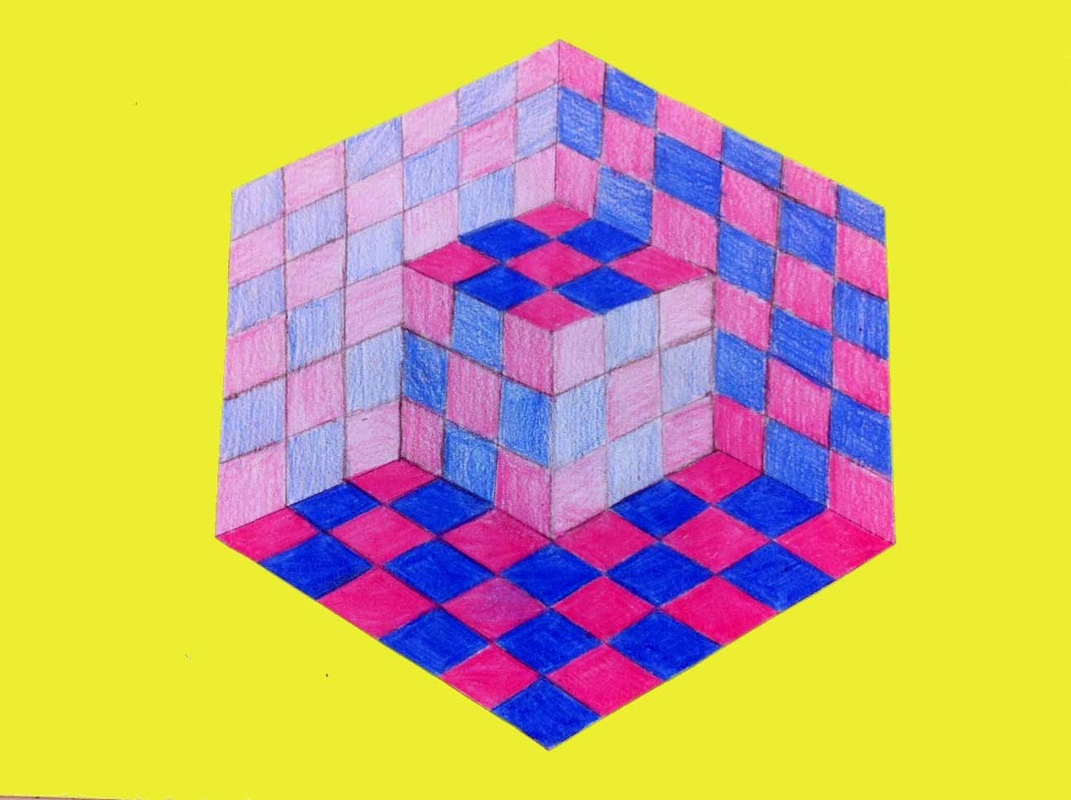
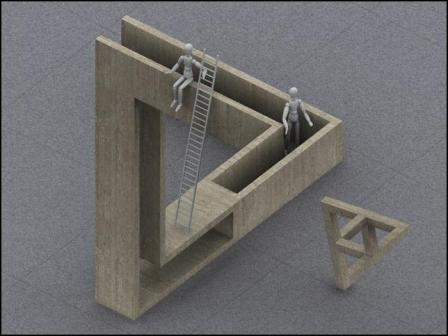
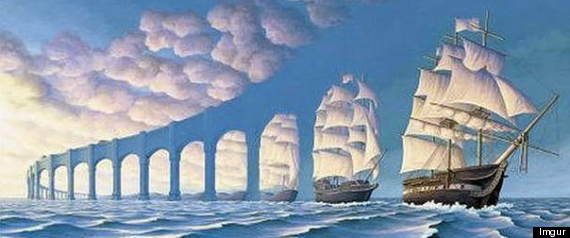
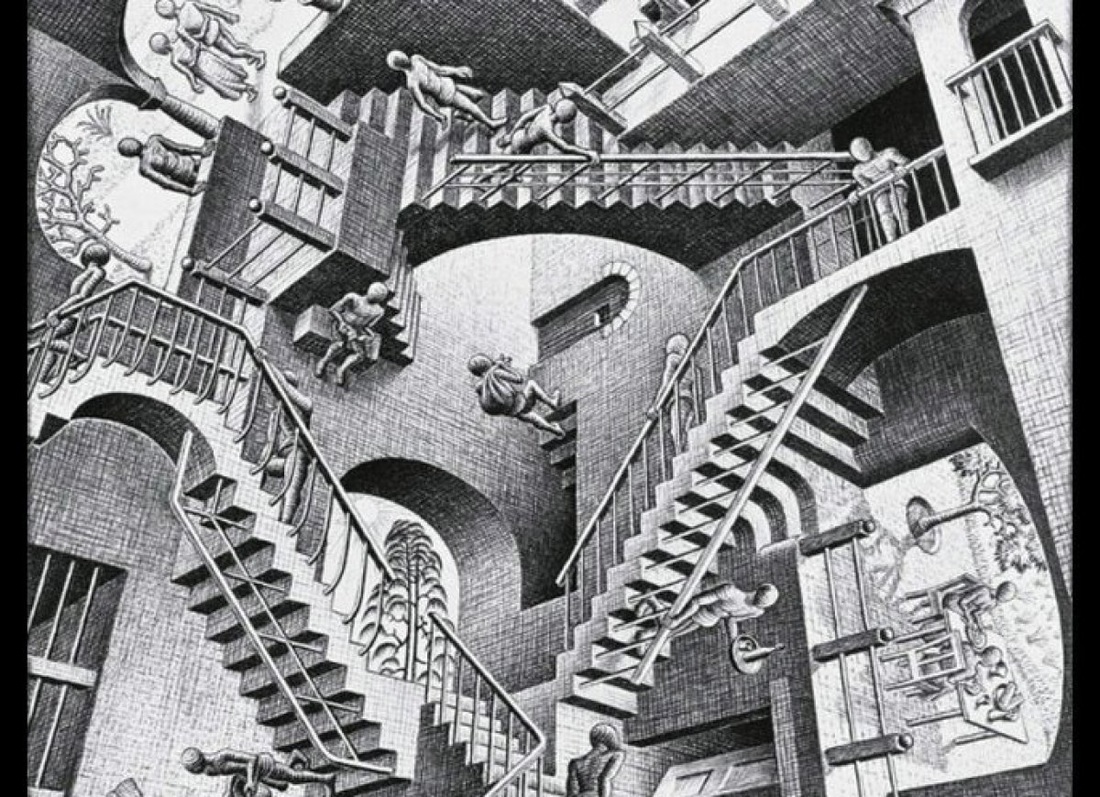
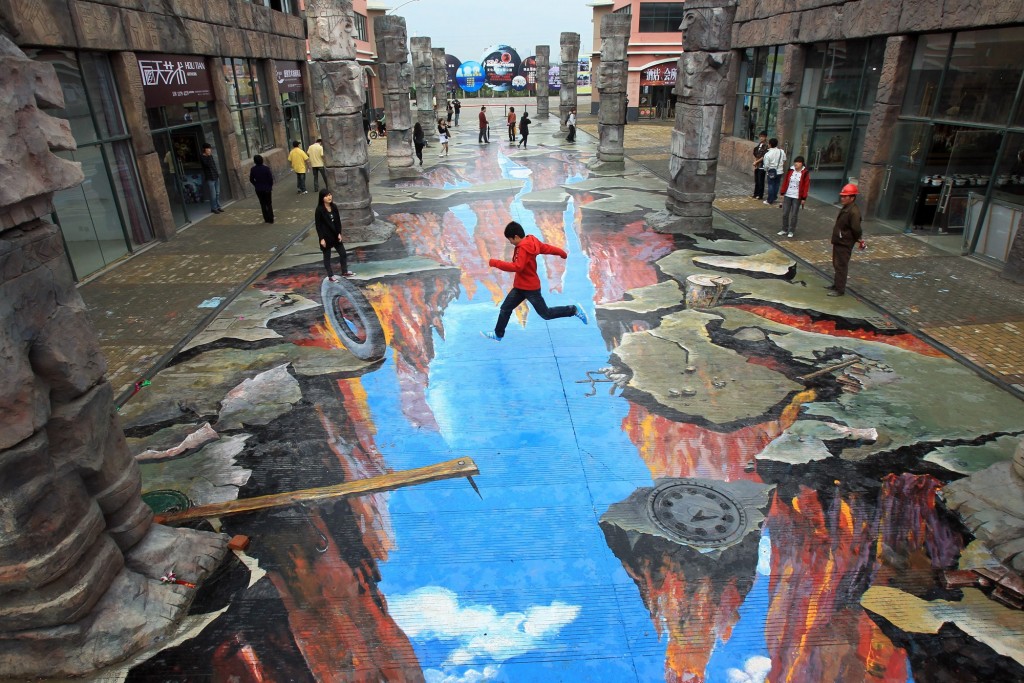
Optical Illusions
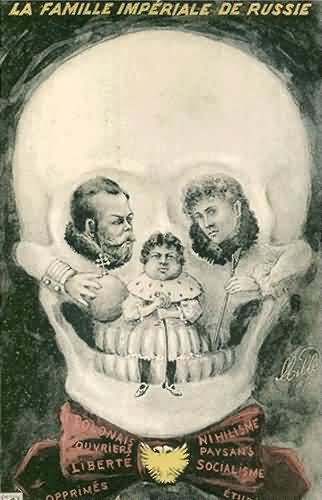
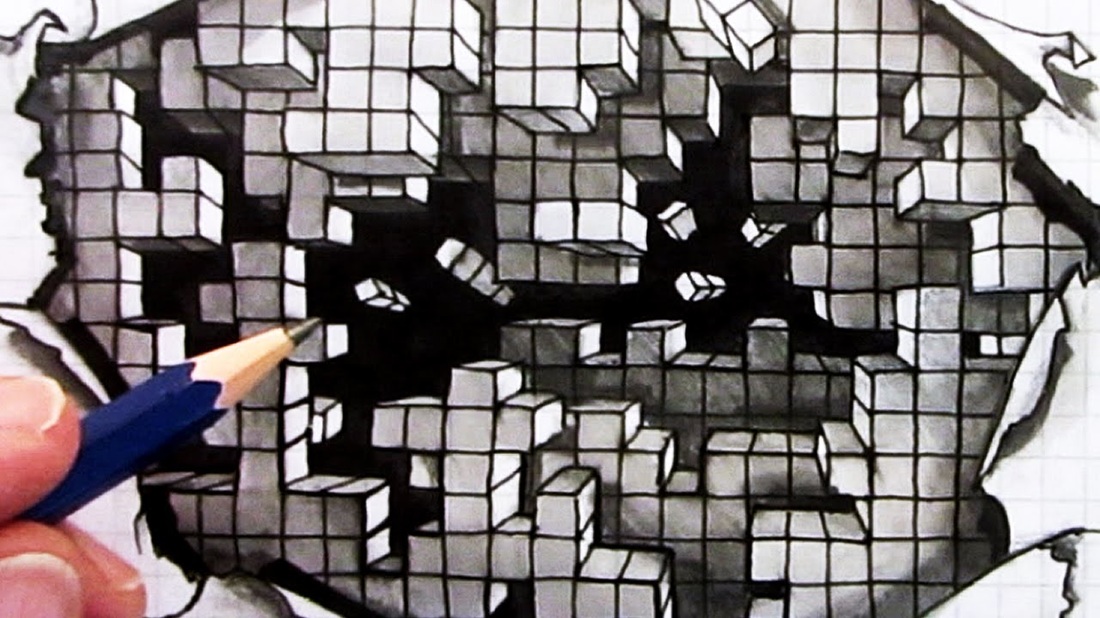
Optical illusions are errors in perception. It is the nature of your sight and the relationship between your eye and brain that cause optical illusions to occur. It's almost impossible to look anywhere in the world without seeing some kind of illusion at work. Paintings, posters, magazine covers, advertisements, all operate at one time or another on the basis of illusion. Special effects in the movies and on television fool our eyes into thinking that people can fly, that magic is real, and that robots made of liquid metal can exist. All of these are illusions, but are so skillfully created that they appear to be real. Illusions are common, but that does not make them ineffective. They are useful for communication and entertainment. Learning how to create and manipulate optical illusions is one of the key skills of the artist, craftsperson or designer.
There are many different types of optical illusions. Some cause movement, while others contain hidden images. If you search the Internet, you will find thousands of wild and wonderful optical illusions. Here are some examples.
For detailed information on optical illusions, please see the PowerPoint presentation below that we will discuss in class.
|
|
|


|
| ||||
Optical Illusion Sketchbook Project
Due September 26, 2016
Before beginning our project, we need to practice drawing optical illusions so we will have a better understanding of how to construct them.
Due September 26, 2016
Before beginning our project, we need to practice drawing optical illusions so we will have a better understanding of how to construct them.
|
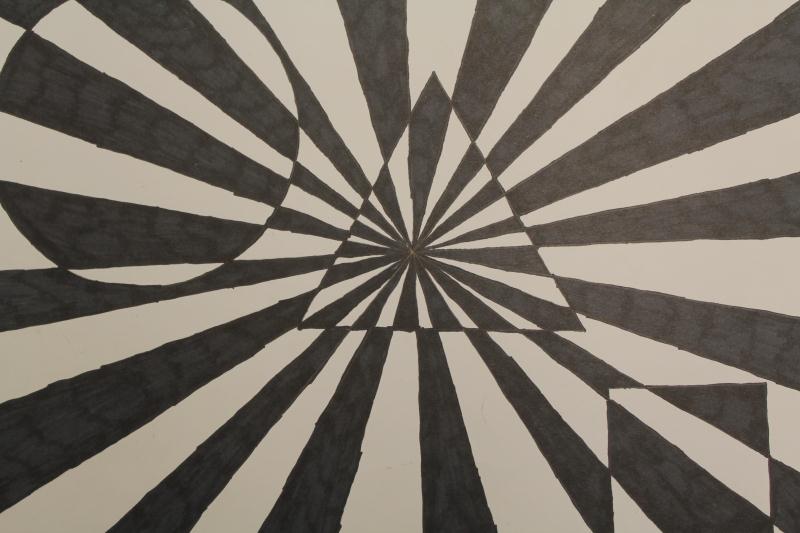
Sketch #1 - Sections and Shapes
Put a point in the middle of your page. Draw straight lines through this point, then draw a series of shapes all over the page. Make sure you don't overap your shapes. Now you're ready for shading. You will shade only one section at a time. In the first section you will only shade the area around the shape in that section. In the second section, you will only shade the shape in that section. Continue alternating between shading the shape and the space around the shape until you have shading in every section. 
Sketch #3 - Thick and Thin Columns
On the left of your page, draw a wide column and fill it with shading. Leave a space, then draw another column that's slightly thinner than the first. Leave a slightly smaller space, then draw a slightly thinner column than the one you just drew. Keep following this pattern until your column is so thin that it's just a single pencil line. Then start getting gradually thicker again with your columns and spaces between. 
|
Sketch #2 - Sliding Bricks
Using a ruler, draw 5 or 6 horizontal lines across your page. In the bottom space, divide it using 4 or 5 vertical lines and shade every second space (like you would do if you were drawing bricks). In the next space above, draw your vertical lines slightly to the right of the ones you drew underneath. Shade the spaces above the ones you shaded in the first row. For your third row up, draw vertical lines in the same places as you did in the first row. Shade in your spaces. Repeat this pattern all the way to the top. 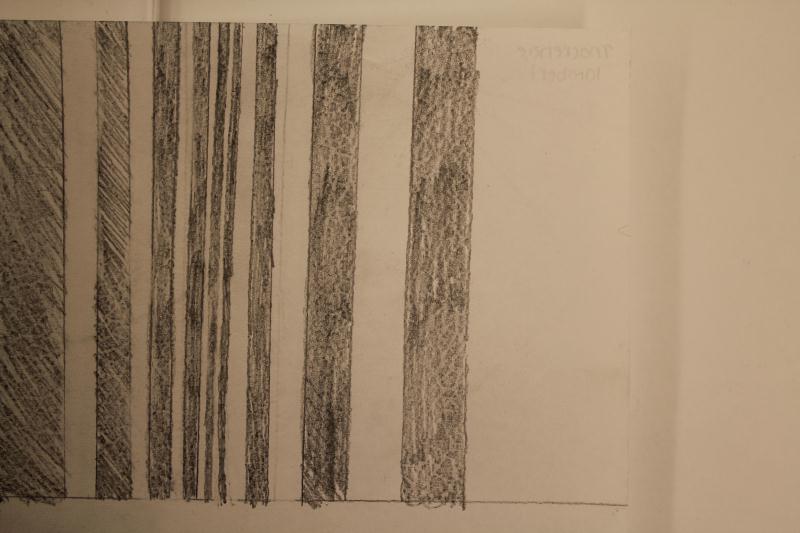
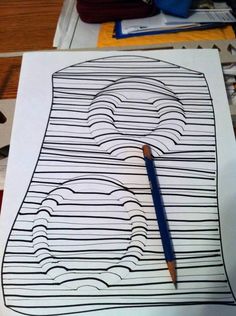
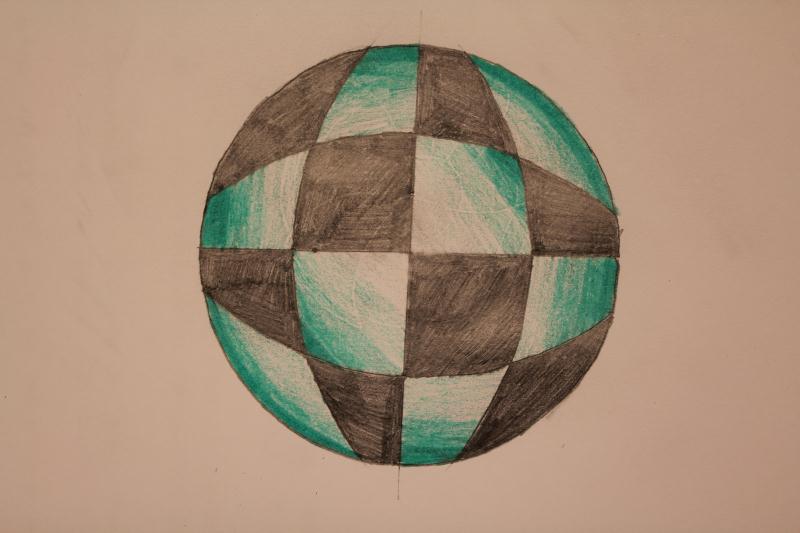
Sketch #4 - Donut
Using a compass, draw a small circle in the center of your page. Using the same center point, draw a circle that is only slightly larger than the first. Draw 5 or 6 more circles, each one getting slightly wider. Then start drawing circles that become closer to the previous ones you drew. Draw a curved line from the center of the circle to the edge. Draw 7 more lines like this, each one curved in the same direction and breaking the circle into equal pieces. Erase the center circle. Shade every second shape in the inner ring. Alternate your shading in the next ring, making sure that you don't have two dark or white areas touching. Repeat this shading pattern until you have your entire wheel shaded. |
|
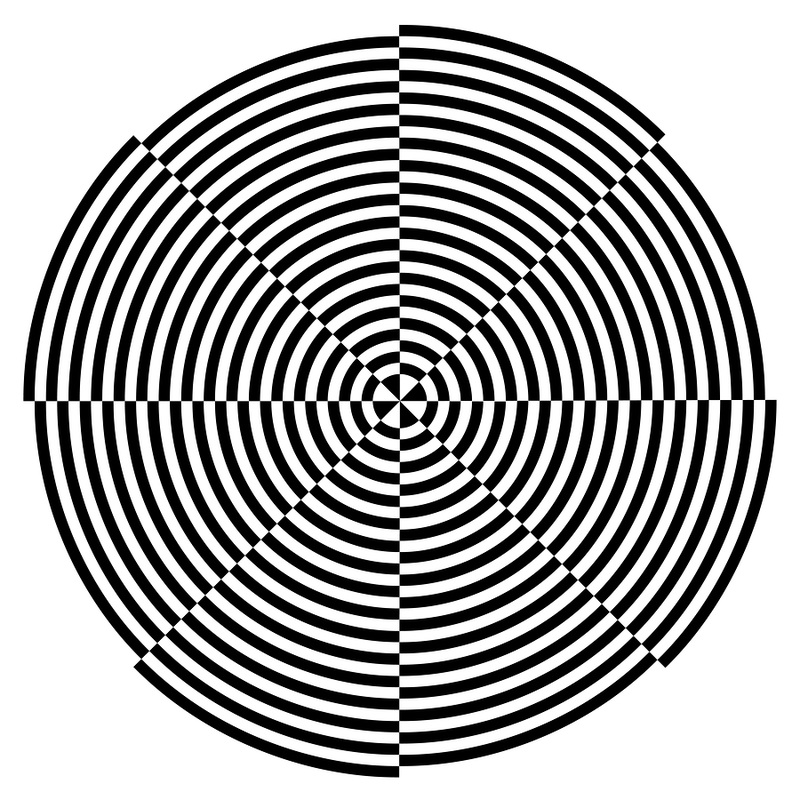
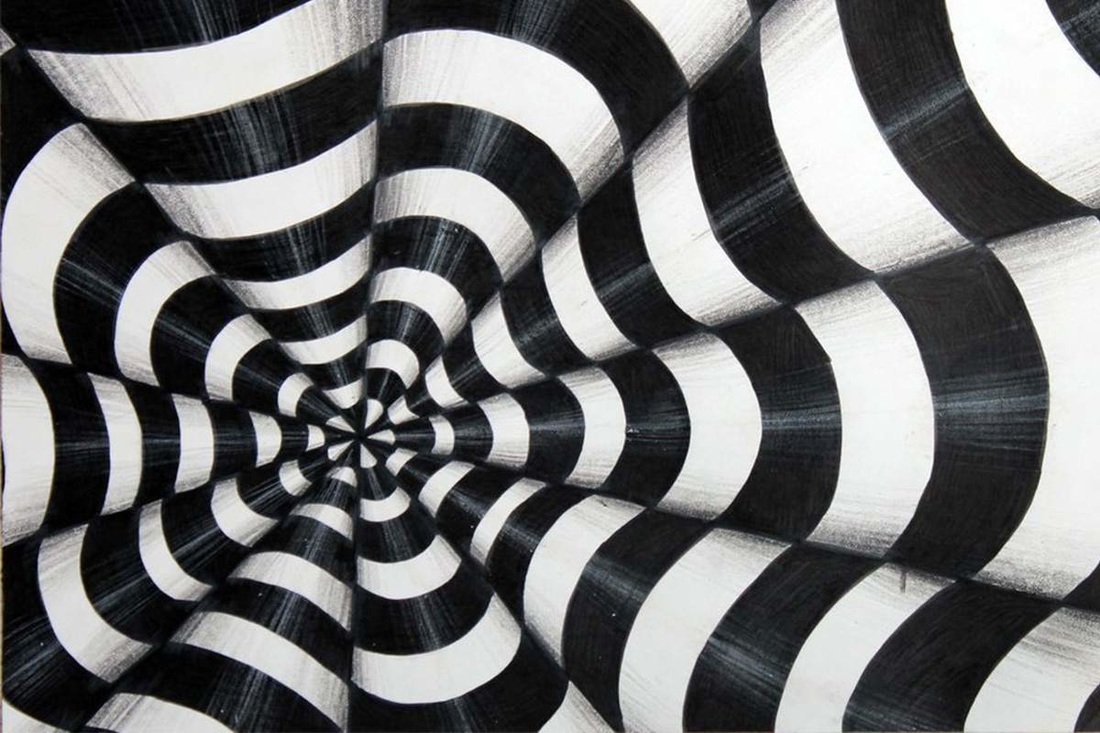
Sketch #5 - Concentric Circle
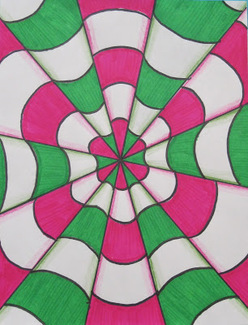
Draw a large circle in the center of your page. Using a ruler, divide your circle in half. Place a protractor on the center of this line to find the 90 degree mark. Draw a straight line through the center of your circle and this 90 degree mark. Your circle should now be divided into quadrants. Place the sharp end of your compass at one point where one of your lines touches the outside of your circle. Open your compass until the pencil lands just over 3/4 of the diameter of the circle. Draw an arc from one side of the circle to the other. Making sure your compass stays the same width, move the sharp end to another point on the outside of the circle. Draw another arc on the opposte side, again just over 3/4 of the way across the circle. Do this two more times, drawing two more arcs. Shade in every second space in your circle. Using a colouring lead, shade in every white space going from dark on the outside of the circle to light towards the center. In the large two white spaces in the center, go from dark in the outside corners to light towards the center. |
|
|
| ||||||||
Please write the following rules of optical illusions in your folder (or art book if you make it creative):
1. Alternate between black and white lines/shapes. Objects should get smaller the closer they get to the center (sketch #1).
2. Slightly moving the edges of shapes so they don't perfectly line up will create movement (sketch #2).
3. Changing the width of lines will create depth (sketch #3).
4. To make something look round, draw circles close together using the same central point, then increase the width between them, then decrease it (sketch #4).
5. Be neat; draw crisp lines and shapes with clean edges. Don't colour outside the lines.
"Life is an Optical Illusion" Artwork
Due October 7, 2016
Before beginning this assignment, you must show me that you have all of the required sketches completed. Now you have the opportunity to create your own unique optical illusion! For complete project details, please see the project description and evaluation file below.
Due October 7, 2016
Before beginning this assignment, you must show me that you have all of the required sketches completed. Now you have the opportunity to create your own unique optical illusion! For complete project details, please see the project description and evaluation file below.
|
| ||||||||
Complementary Colour Optical Illusion Painting
Due October 24, 2016
For this project, you will learn about colour theory and use complementary colours in your image. You will learn to recognize primary colours, secondary colours, and complementary colours. You will create an optical illusion using simple lines and complementary colours. By using complementary colours and careful painting skills, you will create the illusion of space and movement in your painting.
For more detailed information on colour theory, please see the PowerPoint presentation below.
|
|
| ||||||
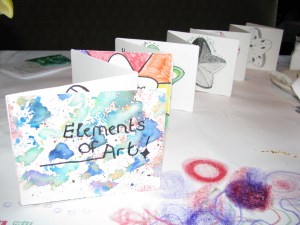
Elements of Design Book (Paper Engineering and Visual Journaling)
Due November 21, 2016
This project will incorporate many different art techniques. We will first look at the elements of design.
The elements of design are the building blocks with which the artist creates an artwork. The elements of design consist of line, shape, form, colour, value, space, and texture. For more information, please see the PowerPoint presentation below that we will discuss in class.
|
|
| ||||||
Before we begin this book, we will also discuss the art of paper engineering, altered books, and visual journaling.
The design and creation of pop-up books (three-dimensional or movable book), tunnel books, volvelles, flaps, pull-tabs, pop-outs, pull-downs, and more of such books in arts is sometimes called paper engineering. Here are some examples of paper engineering.
An altered book is obviously a book that has been altered or changed in some way. Altering books can be a fun way to express yourself while creating something beautiful. Art is a means of expressing the heart in a visual way, and altering books makes it easy to express yourself. For detailed information on altered books, please see this website.
An art diary, art journal or visual journal is a daily journal kept by artists, often containing both words and sketches, and occasionally including mixed media elements such as collages. Such books will frequently contain rough workings of ideas later to appear in finished works, as well as acting as a normal diary by allowing the artist to record their day-to-day activities and emotions.
Instructions:
- Choose and create a template shape that you will use for your book theme
- Cut an 11x17" piece of white paper in half so that you make 2 long pieces (2 pieces that are 5.5x17")
- Glue the 2 pieces together.
- Accordion fold the paper so that you have 16 sections
- On the first section, write “Elements of art” (that's your cover page)
- Skip the second section
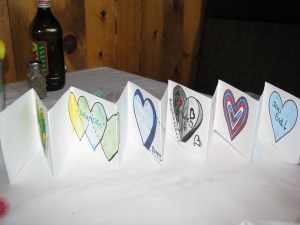
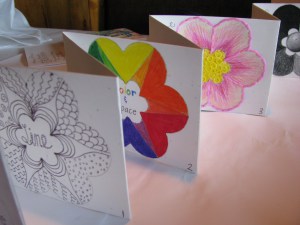
- On the third section write “Line” at the top of the page, trace the template onto the center of the page and fill it up with types of lines.
- Skip the next section
- Continue with one page blank and one page filled with each of the elements of art :Line, color, shape, value, space, form, texture
- Now, flip it over. On the back of the last element of art you did your going to write “Principles of Design” and again, alternating 1 page filled, one page empty, trace the template onto each page, fill in the shape with decorations that express that principle of design (because it is the back of the accordion, you will find that you can only fit 6 principles, so do two on the same page).
The goal is to have a book that when open one way shows all the elements of art and when turned around will list all the principles of design.
The design and creation of pop-up books (three-dimensional or movable book), tunnel books, volvelles, flaps, pull-tabs, pop-outs, pull-downs, and more of such books in arts is sometimes called paper engineering. Here are some examples of paper engineering.
An altered book is obviously a book that has been altered or changed in some way. Altering books can be a fun way to express yourself while creating something beautiful. Art is a means of expressing the heart in a visual way, and altering books makes it easy to express yourself. For detailed information on altered books, please see this website.
An art diary, art journal or visual journal is a daily journal kept by artists, often containing both words and sketches, and occasionally including mixed media elements such as collages. Such books will frequently contain rough workings of ideas later to appear in finished works, as well as acting as a normal diary by allowing the artist to record their day-to-day activities and emotions.
Instructions:
- Choose and create a template shape that you will use for your book theme
- Cut an 11x17" piece of white paper in half so that you make 2 long pieces (2 pieces that are 5.5x17")
- Glue the 2 pieces together.
- Accordion fold the paper so that you have 16 sections
- On the first section, write “Elements of art” (that's your cover page)
- Skip the second section
- On the third section write “Line” at the top of the page, trace the template onto the center of the page and fill it up with types of lines.
- Skip the next section
- Continue with one page blank and one page filled with each of the elements of art :Line, color, shape, value, space, form, texture
- Now, flip it over. On the back of the last element of art you did your going to write “Principles of Design” and again, alternating 1 page filled, one page empty, trace the template onto each page, fill in the shape with decorations that express that principle of design (because it is the back of the accordion, you will find that you can only fit 6 principles, so do two on the same page).
The goal is to have a book that when open one way shows all the elements of art and when turned around will list all the principles of design.
|
|
|
|
| ||||
To help us understand each of the design elements, we will look at these videos. The PowerPoint presentations below will also be used in class to help explain the Space element of art.
|
| ||||
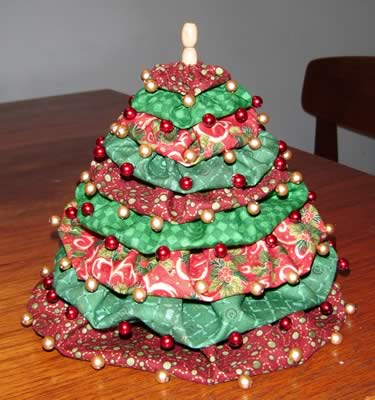
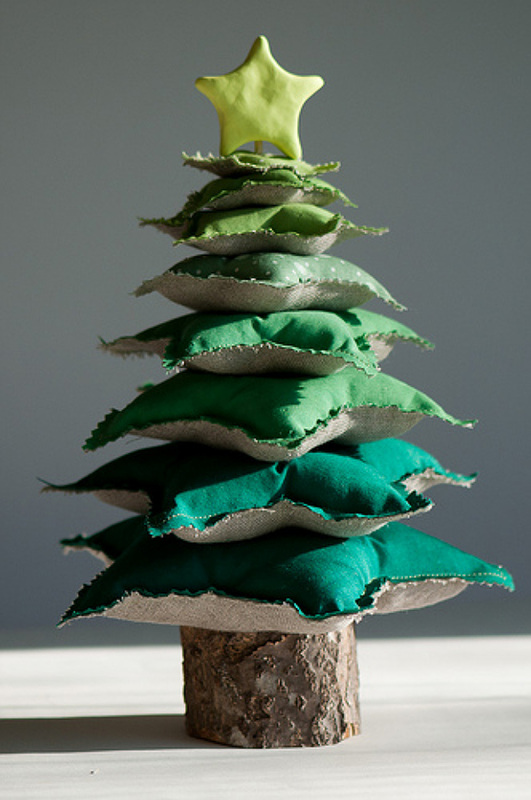
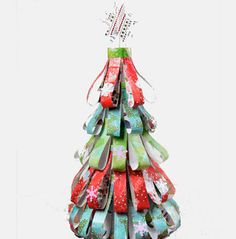
Christmas Tree Challenge - Due December 4, 2015
For this project, you will have to create your own handmade Christmas Tree. You will only be allowed to use supplies that we have around the classroom and anything that you can recycle, so it will be a challenge. You will need to be creative to create the most interesting, cheerful, and sturdy Christmas Tree possible.
Your Christmas tree will be a sculpture in-the-round. A sculpture in-the-round is a 3-dimensional sculpture that can be viewed from all sides.
Christmas Tree requirements:
Tree must be a minimum of 18 inches high
Tree must be a sculpture in-the-round which is free-standing
Tree must be colourful, bright, and cheerful
Tree must be constructed with recycled materials (although decorations/accessories may be added)
|
|
|
|
| ||||||||
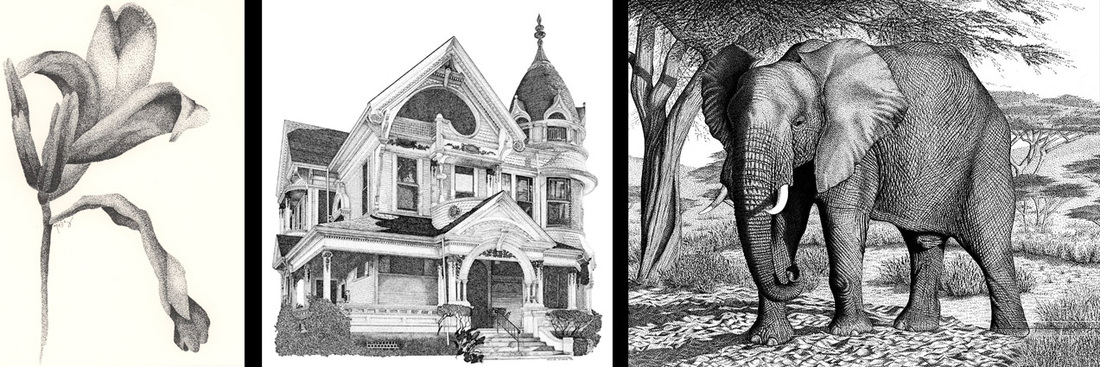
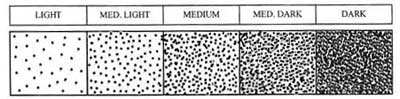
Stippling
Stippling is a form of shading that just uses dots. The denser the dots, the darker the shade.
We will practice the technique of stippling by using various tools in the classroom. Using a HB pencil, lightly draw the outline of each object from the following worksheets in your sketchbook. You may then choose a variety of drawing tools such as pencils, pens or markers to create your shading with dots. Take your time, since rushing will create short lines, not dots.
Stippling Project - Due November 28, 2014
Once you've completed the drawings from the two practice worksheets in your sketchbook, you can start your stippling project on drawing paper.
For detailed information on the stippling project and evaluation, please see the link below.
|
| ||||||||
