Grade 7/8/9 Art Projects
Stamp Design Contest
Each year the Cupids Legacy Centre has a stamp design contest. Grade 9 students will be competing in the senior level of the contest and designing stamps based on the theme of "Celebrate Our Flag's 50th Birthday". These designs will be submitted to the contest, but will also be included in report marks.
Designs will be judged based on creativity, originality, neatness, and theme. All entrants will be recognized and winners will be displayed at the Cupids Legacy Centre, the Regional Heritage Fair, and other public venues. Medals and prizes will be awarded to first, second, and third place winners. The Cupids Museum Award of Excellence 2015 and the Cupids Heritage Award.
For complete contest details, please see the PowerPoint presentation below which we will discuss in class.
| canadas_heritage_project_2015.pptx | |
| File Size: | 62 kb |
| File Type: | pptx |
|
| ||||||||||||
|
Complementary Colour
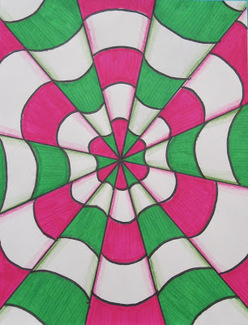
Optical Illusion Painting For this project, you will learn about colour theory and use complementary colours in your image. You will learn to recognize primary colours, secondary colours, and complementary colours. You will create an optical illusion using simple lines and complementary colours. By using complementary colours and careful painting skills, you will create the illusion of space and movement in your painting. For more detailed information on colour theory, please see the PowerPoint presentation below. |
|
| ||||||||||||
|
| ||||||||||||
Elements of Design Book (Paper Engineering and Visual Journaling)
This project will incorporate many different art techniques. We will first look at the elements of design.
The elements of design are the building blocks with which the artist creates an artwork. The elements of design consist of line, shape, form, colour, value, space, and texture. For more information, please see the PowerPoint presentation below that we will discuss in class.
|
| ||||||||||||
Before we begin this book, we will also discuss the art of paper engineering, altered books, and visual journaling.
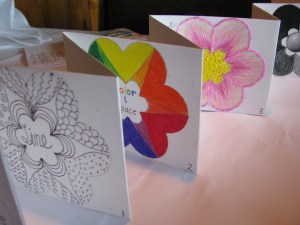
The design and creation of pop-up books (three-dimensional or movable book), tunnel books, volvelles, flaps, pull-tabs, pop-outs, pull-downs, and more of such books in arts is sometimes called paper engineering. Here are some examples of paper engineering.
An altered book is obviously a book that has been altered or changed in some way. Altering books can be a fun way to express yourself while creating something beautiful. Art is a means of expressing the heart in a visual way, and altering books makes it easy to express yourself. For detailed information on altered books, please see this website.
An art diary, art journal or visual journal is a daily journal kept by artists, often containing both words and sketches, and occasionally including mixed media elements such as collages. Such books will frequently contain rough workings of ideas later to appear in finished works, as well as acting as a normal diary by allowing the artist to record their day-to-day activities and emotions.
Instructions:
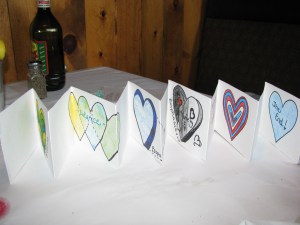
- Choose and create a template shape that you will use for your book theme
- Cut an 11x17" piece of white paper in half so that you make 2 long pieces (2 pieces that are 5.5x17")
- Glue the 2 pieces together.
- Accordion fold the paper so that you have 16 sections
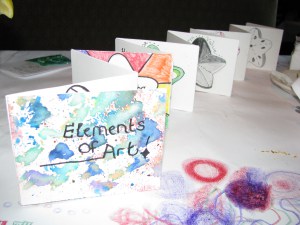
- On the first section, write “Elements of art” (that's your cover page)
- Skip the second section
- On the third section write “Line” at the top of the page, trace the template onto the center of the page and fill it up with types of lines.
- Skip the next section
- Continue with one page blank and one page filled with each of the elements of art :Line, color, shape, value, space, form, texture
- Now, flip it over. On the back of the last element of art you did your going to write “Principles of Design” and again, alternating 1 page filled, one page empty, trace the template onto each page, fill in the shape with decorations that express that principle of design (because it is the back of the accordion, you will find that you can only fit 6 principles, so do two on the same page).
The goal is to have a book that when open one way shows all the elements of art and when turned around will list all the principles of design.
|
| ||||||||||||
To help us understand each of the design elements, we will look at these videos. The PowerPoint presentations below will also be used in class to help explain the Space element of art.
|
| ||||||||||||
Thaumatropes
A thaumatrope is a toy that was popular in the 19th century. A disk with a picture on each side is attached to two pieces of string. When the strings are twirled quickly between the fingers the two pictures appear to blend into one due to the persistence of vision.
Thaumatropes are considered to be an early form of animation.
| Thaumatrope worksheet | |
| File Size: | 66 kb |
| File Type: | jpg |
Flip Books and Stop Motion Animation
A flip book or flick book is a book with a series of pictures that vary gradually from one page to the next, so that when the pages are turned rapidly, the pictures appear to animate by simulating motion or some other change.
Stop motion (also known as stop frame) is an animation technique to make a physically manipulated object or persona appear to move on its own. The object is moved in small increments between individually photographed frames, creating the illusion of movement when the series of frames is played as a continuous sequence.
We will begin by making simple flip books and we will begin planning our stop motion animations.
We will watch some introductory films made by the National Film Board of Canada here. We will also watch some of the NFB's stop motion short films here.
Here are a few other sample stop motion videos to help us get some ideas:
Fantasy Room Perspective Drawing/Collage
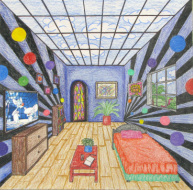
For this project, you will use the 1-point perspective techniques that we learned in class to create your fantasy room. You will have to use perspective techniques when drawing your room and add colour to the finished drawing. You will also have to add details from magazines. Remember that this is your fantasy room, so be creative!
Room requirements (these are minimums, so you can have more of each):
For detailed information on perspective drawing, please see the PowerPoint presentation below.
For this project, you will use the 1-point perspective techniques that we learned in class to create your fantasy room. You will have to use perspective techniques when drawing your room and add colour to the finished drawing. You will also have to add details from magazines. Remember that this is your fantasy room, so be creative!
Room requirements (these are minimums, so you can have more of each):
- Window
- Door
- Bed
- Dresser or bookshelf
- Chair
- Table
- Rug
- Floor or ceiling tiles
- 3 things cut from magazines
- Your name hidden in image somewhere
For detailed information on perspective drawing, please see the PowerPoint presentation below.
|
|
| ||||||||||||||||||
|
|
| ||||||||||||||||||
| fantasy_room_perspective_rubric.doc | |
| File Size: | 37 kb |
| File Type: | doc |
Yourself as a Puppet
For this project, you will learn about different types of puppets. You will also learn about different types of portraits and self portraits.
A portrait is a painting, photograph, sculpture, or other artistic representation of a person. The purpose of a portrait is to display the likeness, personality, and even the mood of the person.
A self-portrait is a representation of an artist that is drawn, painted, photographed, or sculpted by the artist. In a self-portrait, the artist creates a portrait of himself or herself.
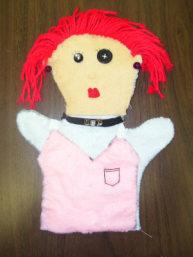
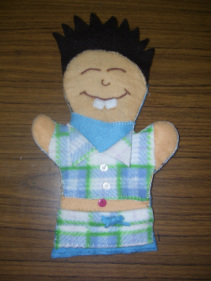
You will create a hand puppet that represents you. Your puppet should not only look like you, but show your artistic style in its creation.
Steps to follow:
1. Draw the details for your puppet on a piece of white paper. Colour your self portrait puppet picture. Make sure to be creative and include little details that will help people recognize your puppet.
2. Use a puppet template to trace 2 body shapes onto the material that you will use for your puppet's body. (Be careful to choose the right puppet template so that your puppet will be big enough to fit your hand).
3. Add clothing to your puppet's front body piece by sewing or gluing it to the puppet body.
4. Add face,hair, and accessories.
5. When you are finished with your body pieces, sew your 2 body pieces around the outside edges. Use whatever stitch you feel comfortable with, but make sure it is sewn together tightly.
Remember to be creative and have fun!
| self_portrait_puppet_rubric.pdf | |
| File Size: | 54 kb |
| File Type: | |
